The Halloween Knight
This is the Halloween Knight from Reaper Miniatures. Going back to 2023 this was a somber but enjoyable project for my friend Sonya at Reds Tattoos in Colchester UK. I had recently moved into a home I inherited after a family member passed away and I was struggling for motivation to paint as I had a lot of paperwork to sort out for the probate at the time. Sonya and her husband were there for me alongside my partner Laura and I wanted to do something to say thank you to them. I picked up this miniature at Colchester Game Fair and I knew what I wanted to do!
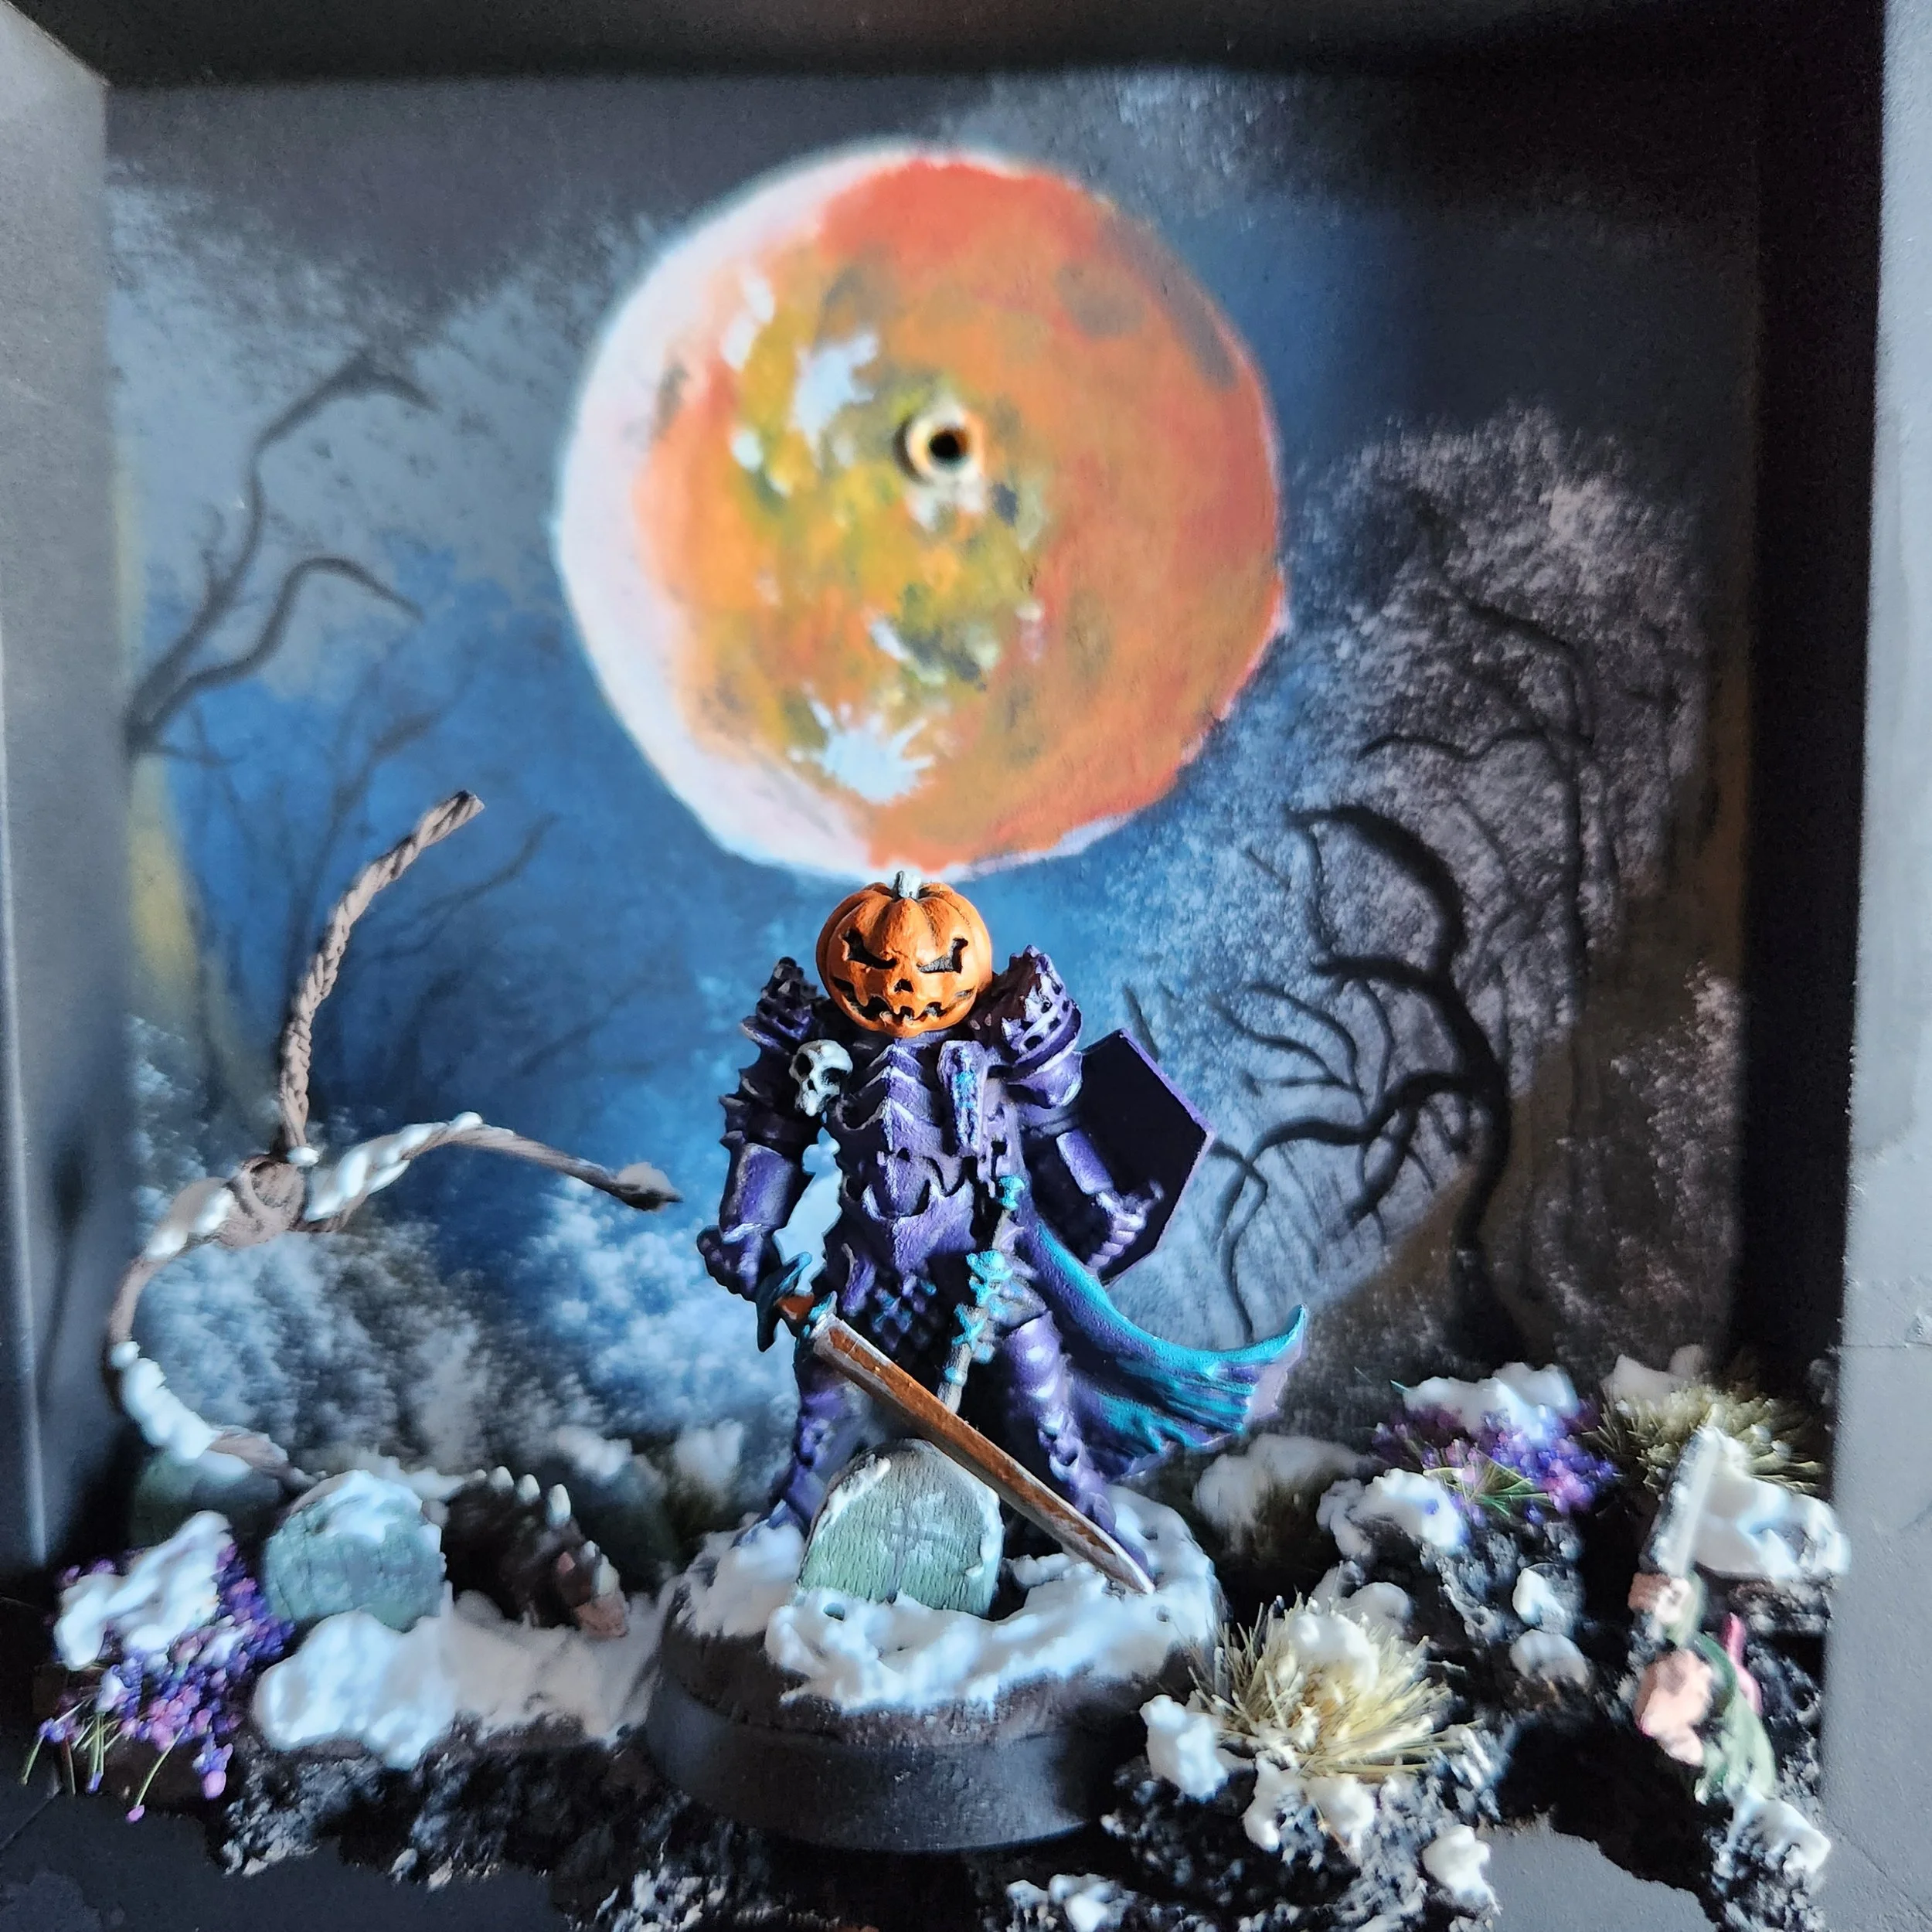
Roman Lappat’s framed miniature dioramas were a huge inspiration for this. I wanted to create a Sleepy Hollow inspired scene for the Knight to be in and for my Friend to hang on her wall at the studio or at home.
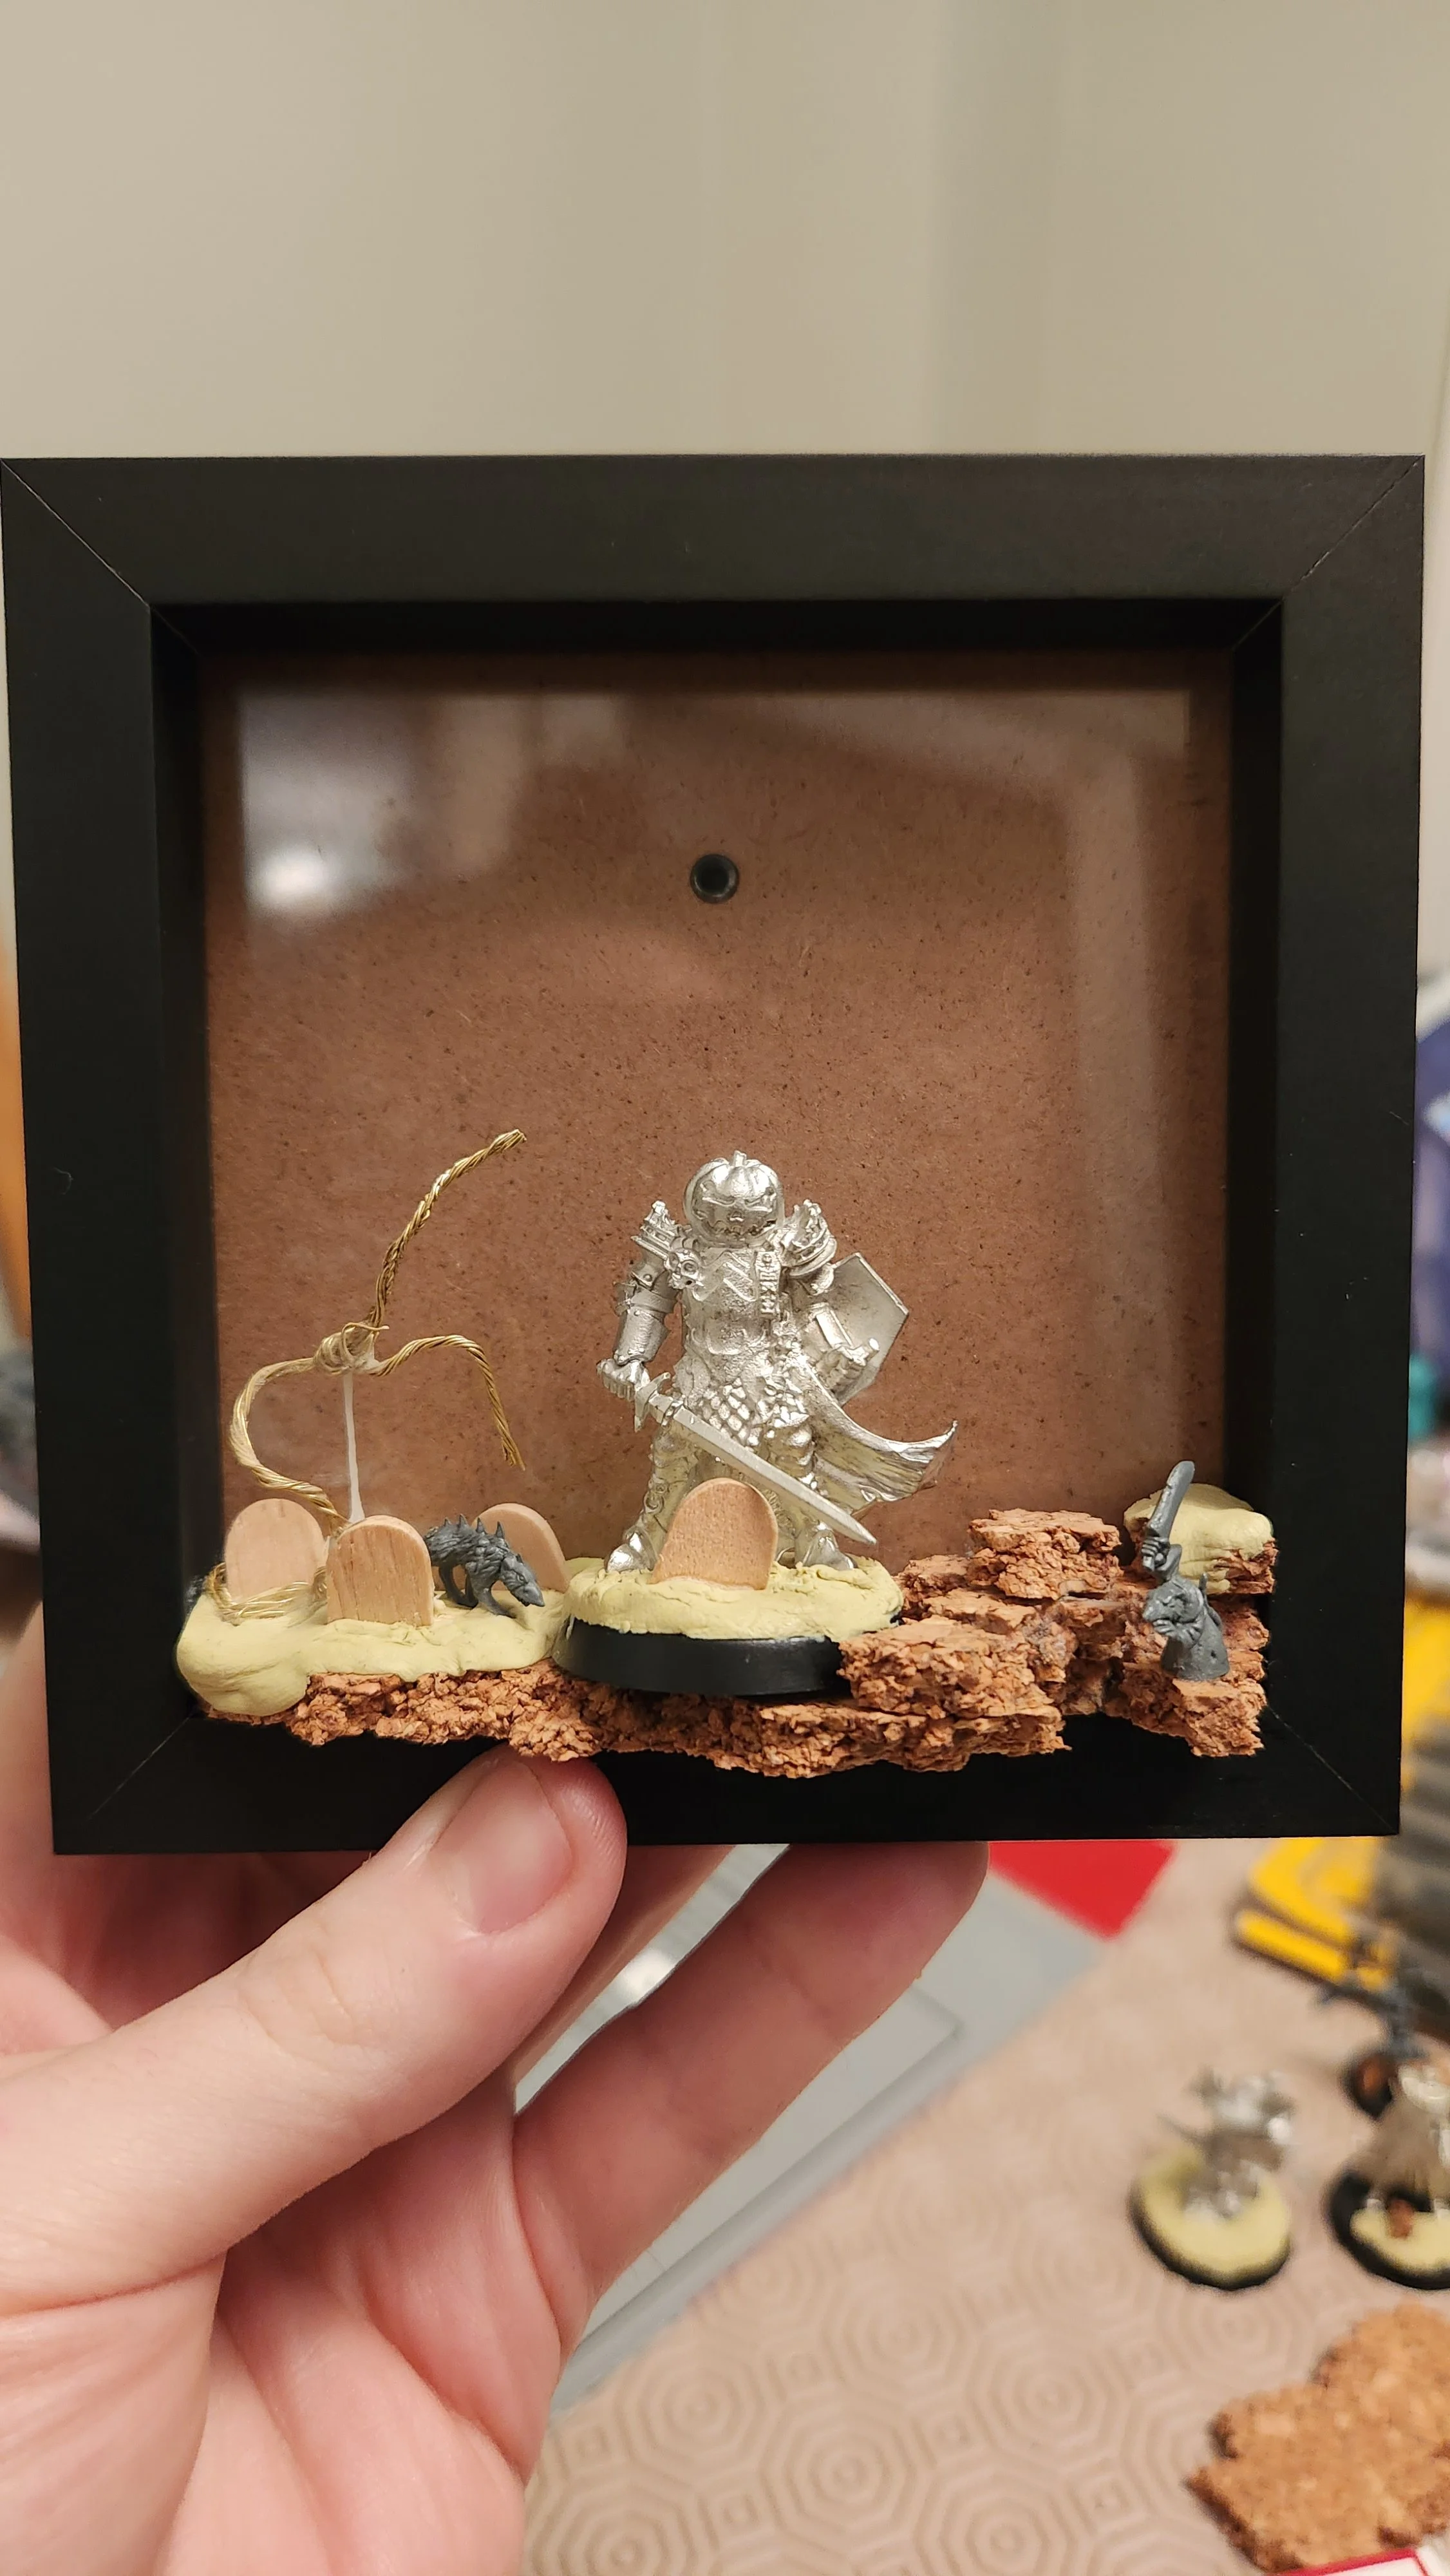
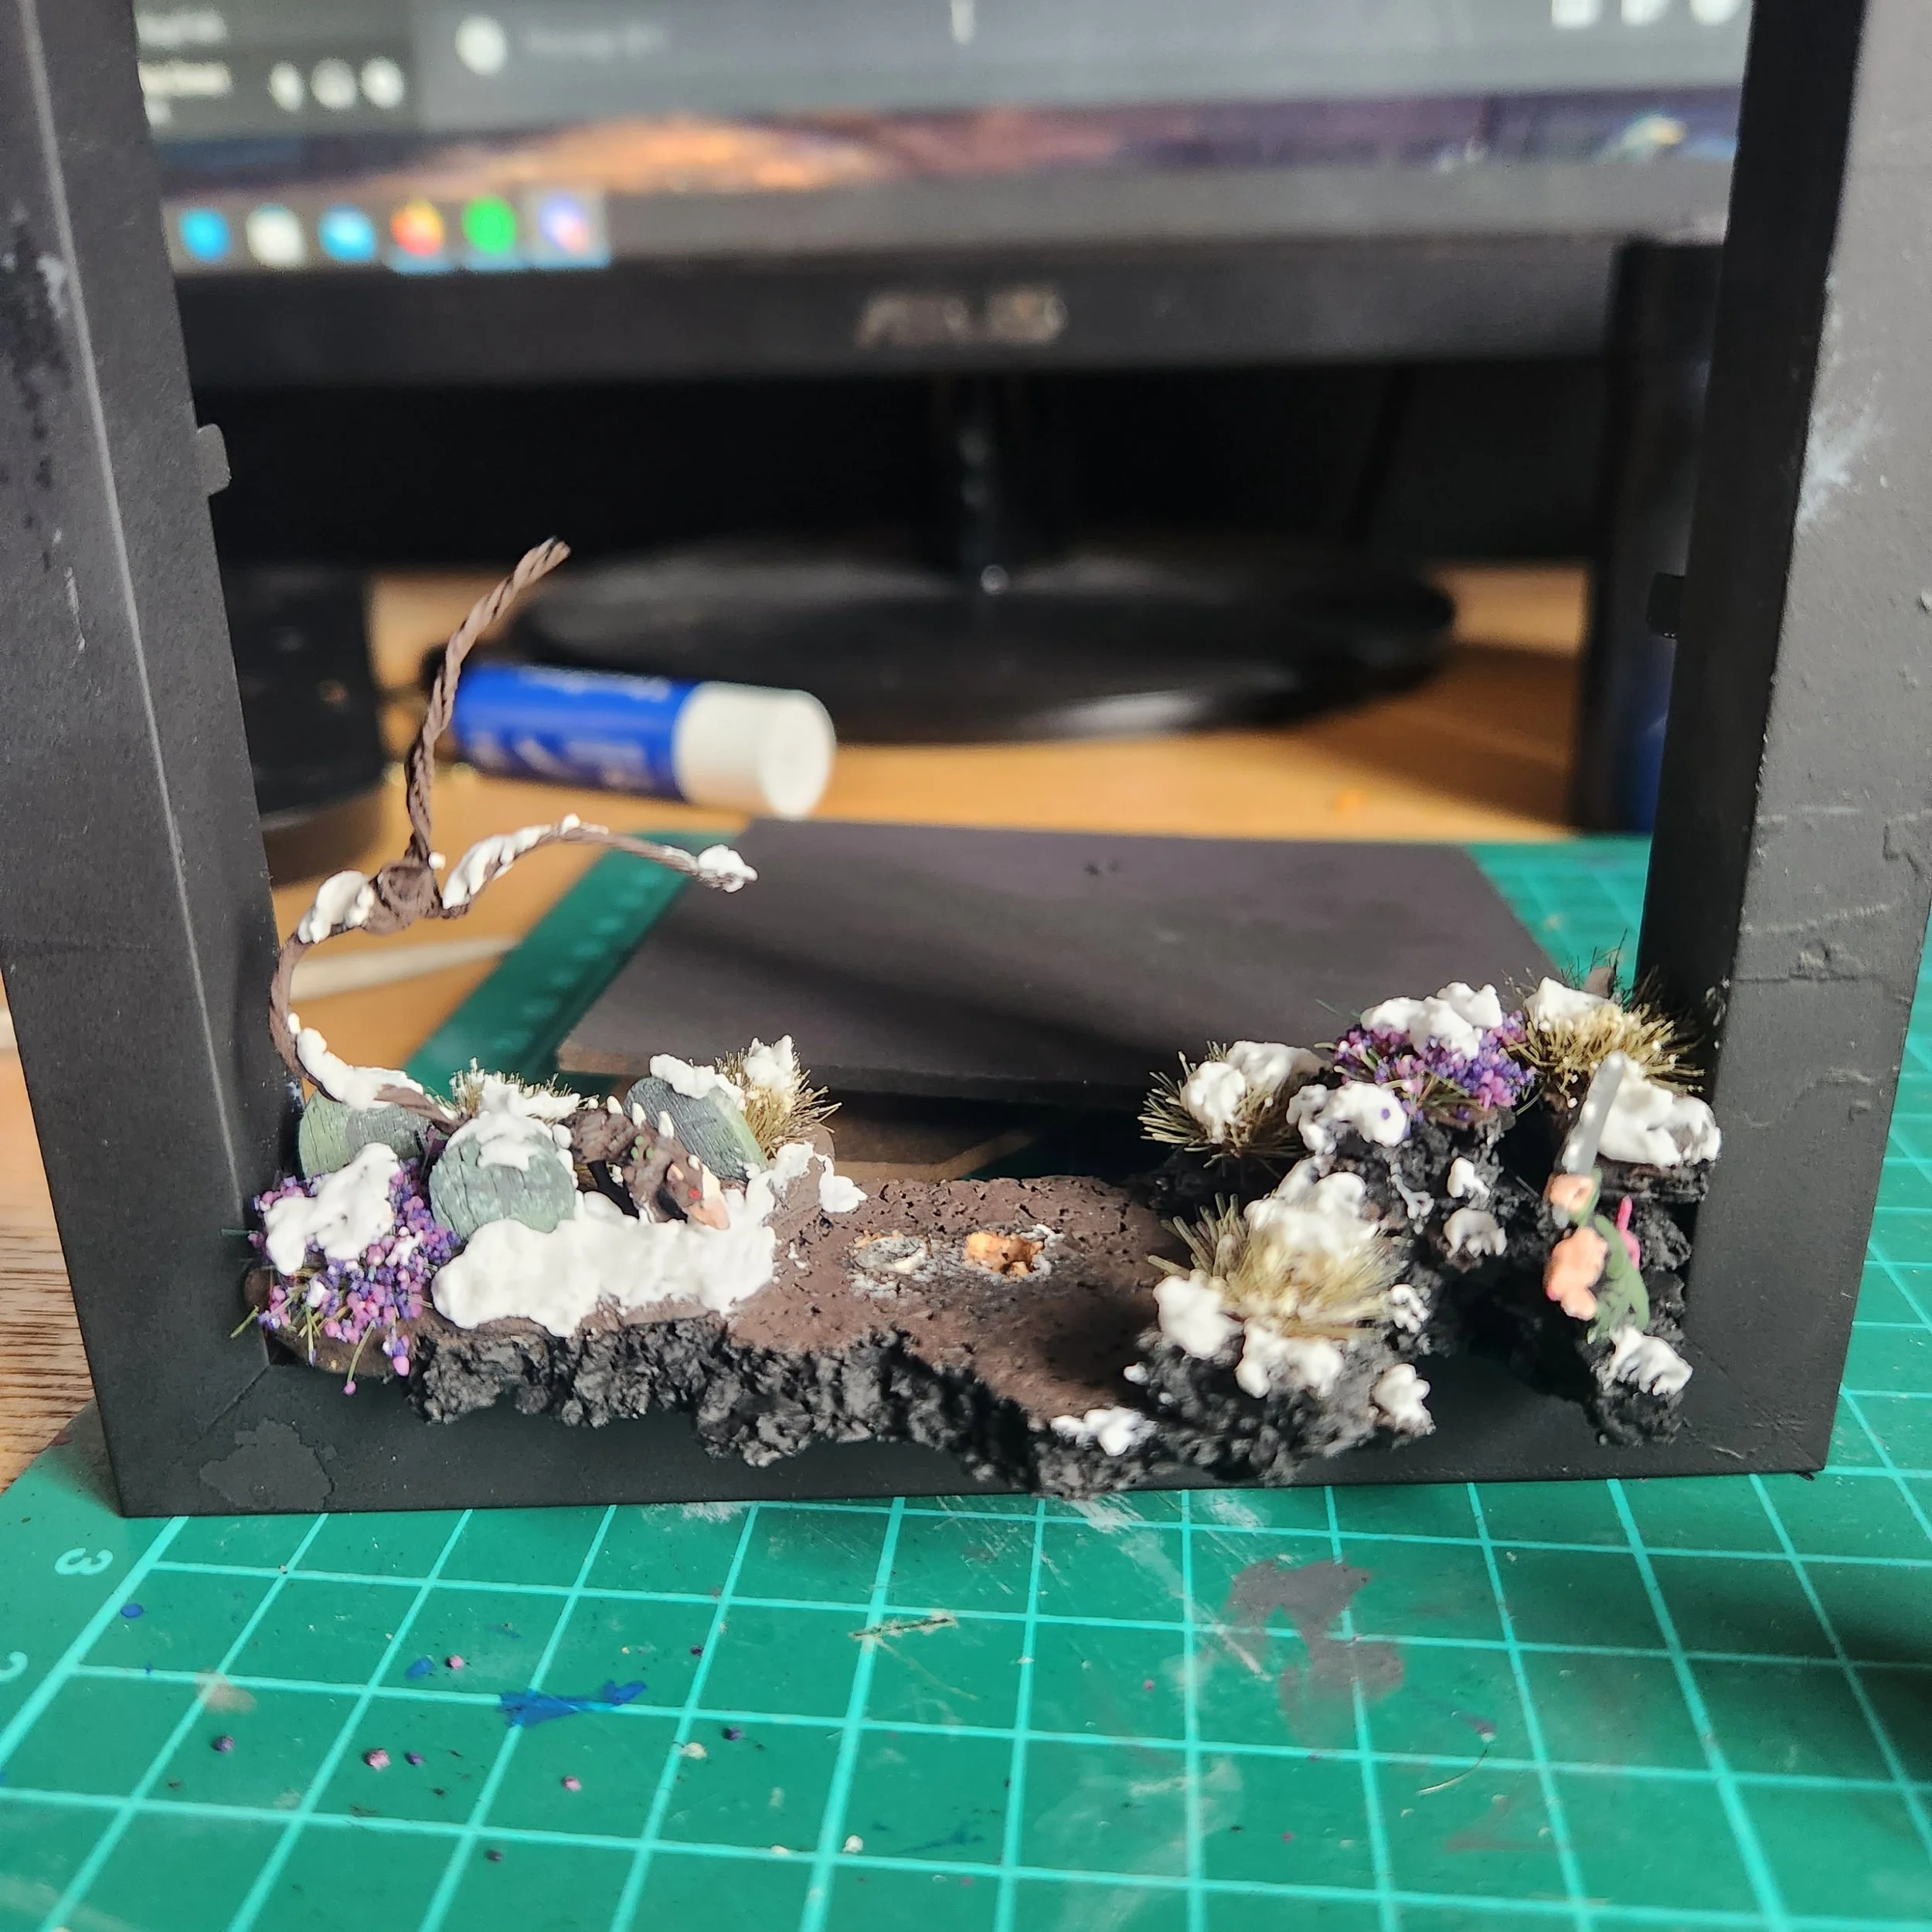
I picked up a cheap square photo frame from a charity shop and I got to work. I knew I wanted the scene to have a graveyard and a gnarly tree as that is what instantly comes to mind when I think Sleepy Hollow. I glued the model together so I had him to hand for reference. I layered up cork into the frame leaving a gap in the centre where his base would slot in so he could be taken out and looked at by himself. I used milliput for the ground floor of the frame and his base which would be later painted and covered over. I went for a classic dome gravemarker look and cut Popsicle sticks to size, gluing them in place at various angles. I used some spare rat minis from my Warhammer Skaven boxes and placed them in the scene for some extra creepy vibes. Finally I made the tree from twisting wire together, I wasn’t worried at the scale of the tree as I envisioned the Knight to be at the foreground of the scene and the tree in the back.
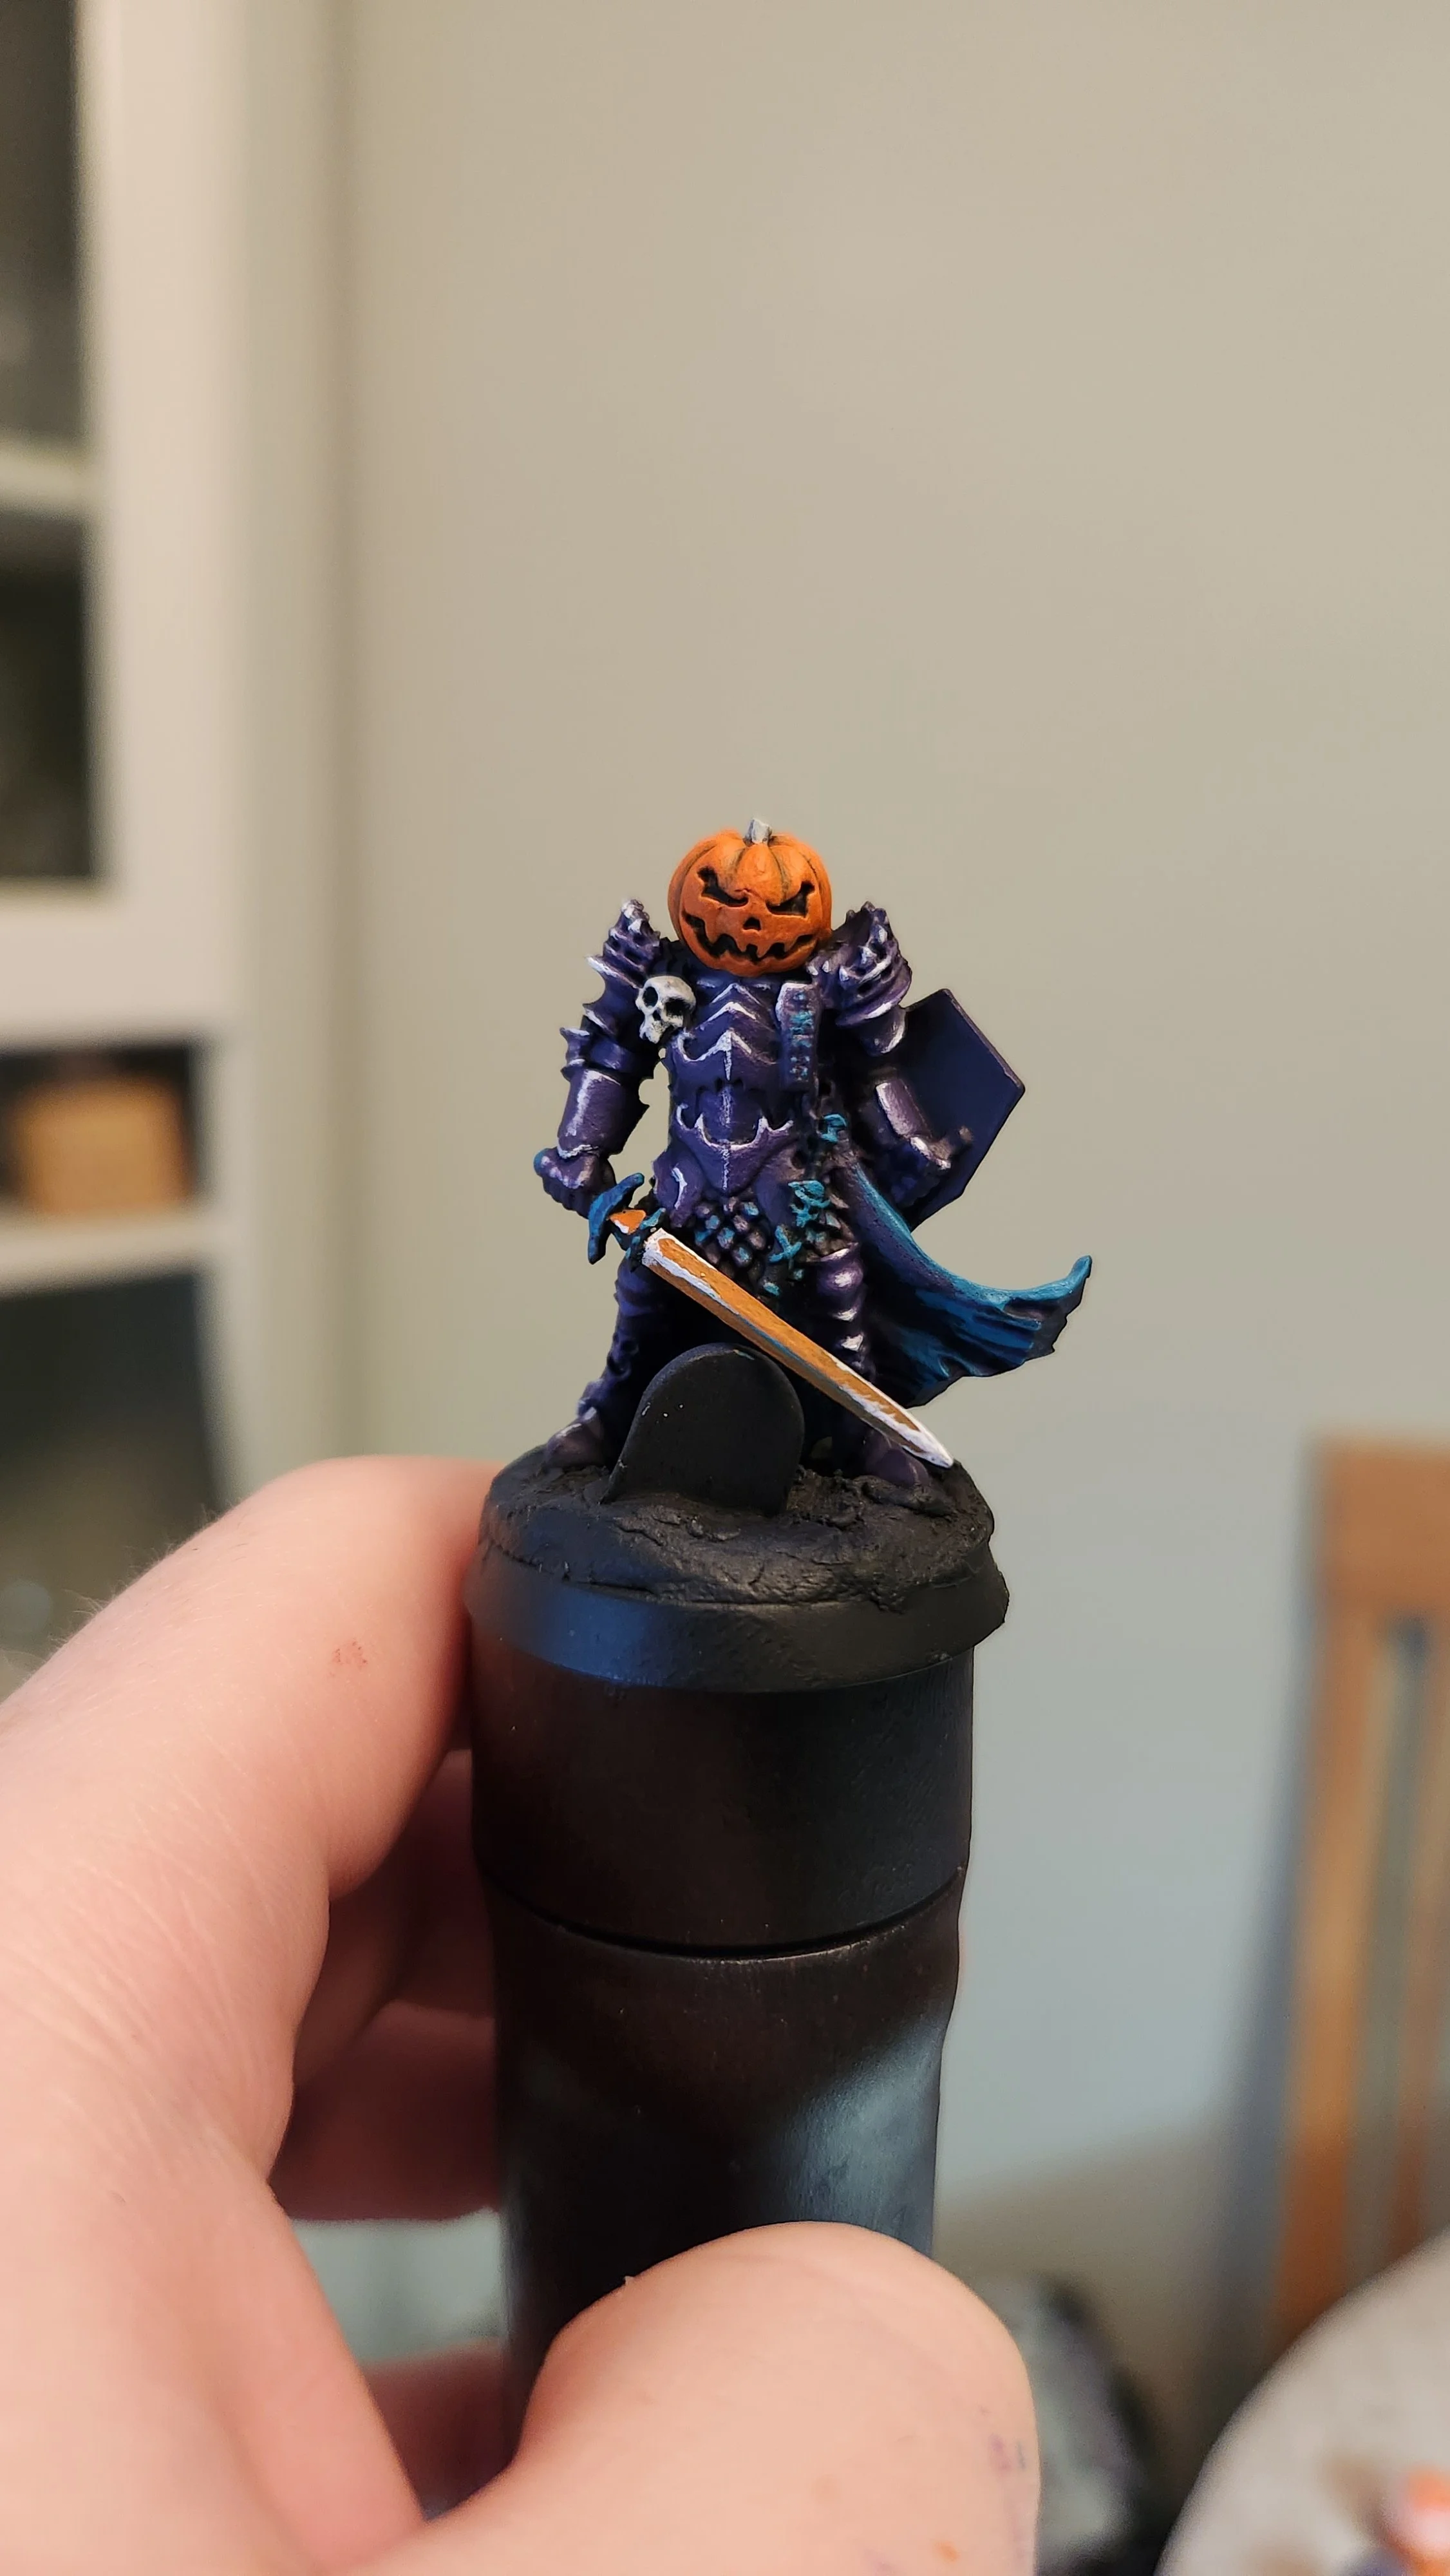
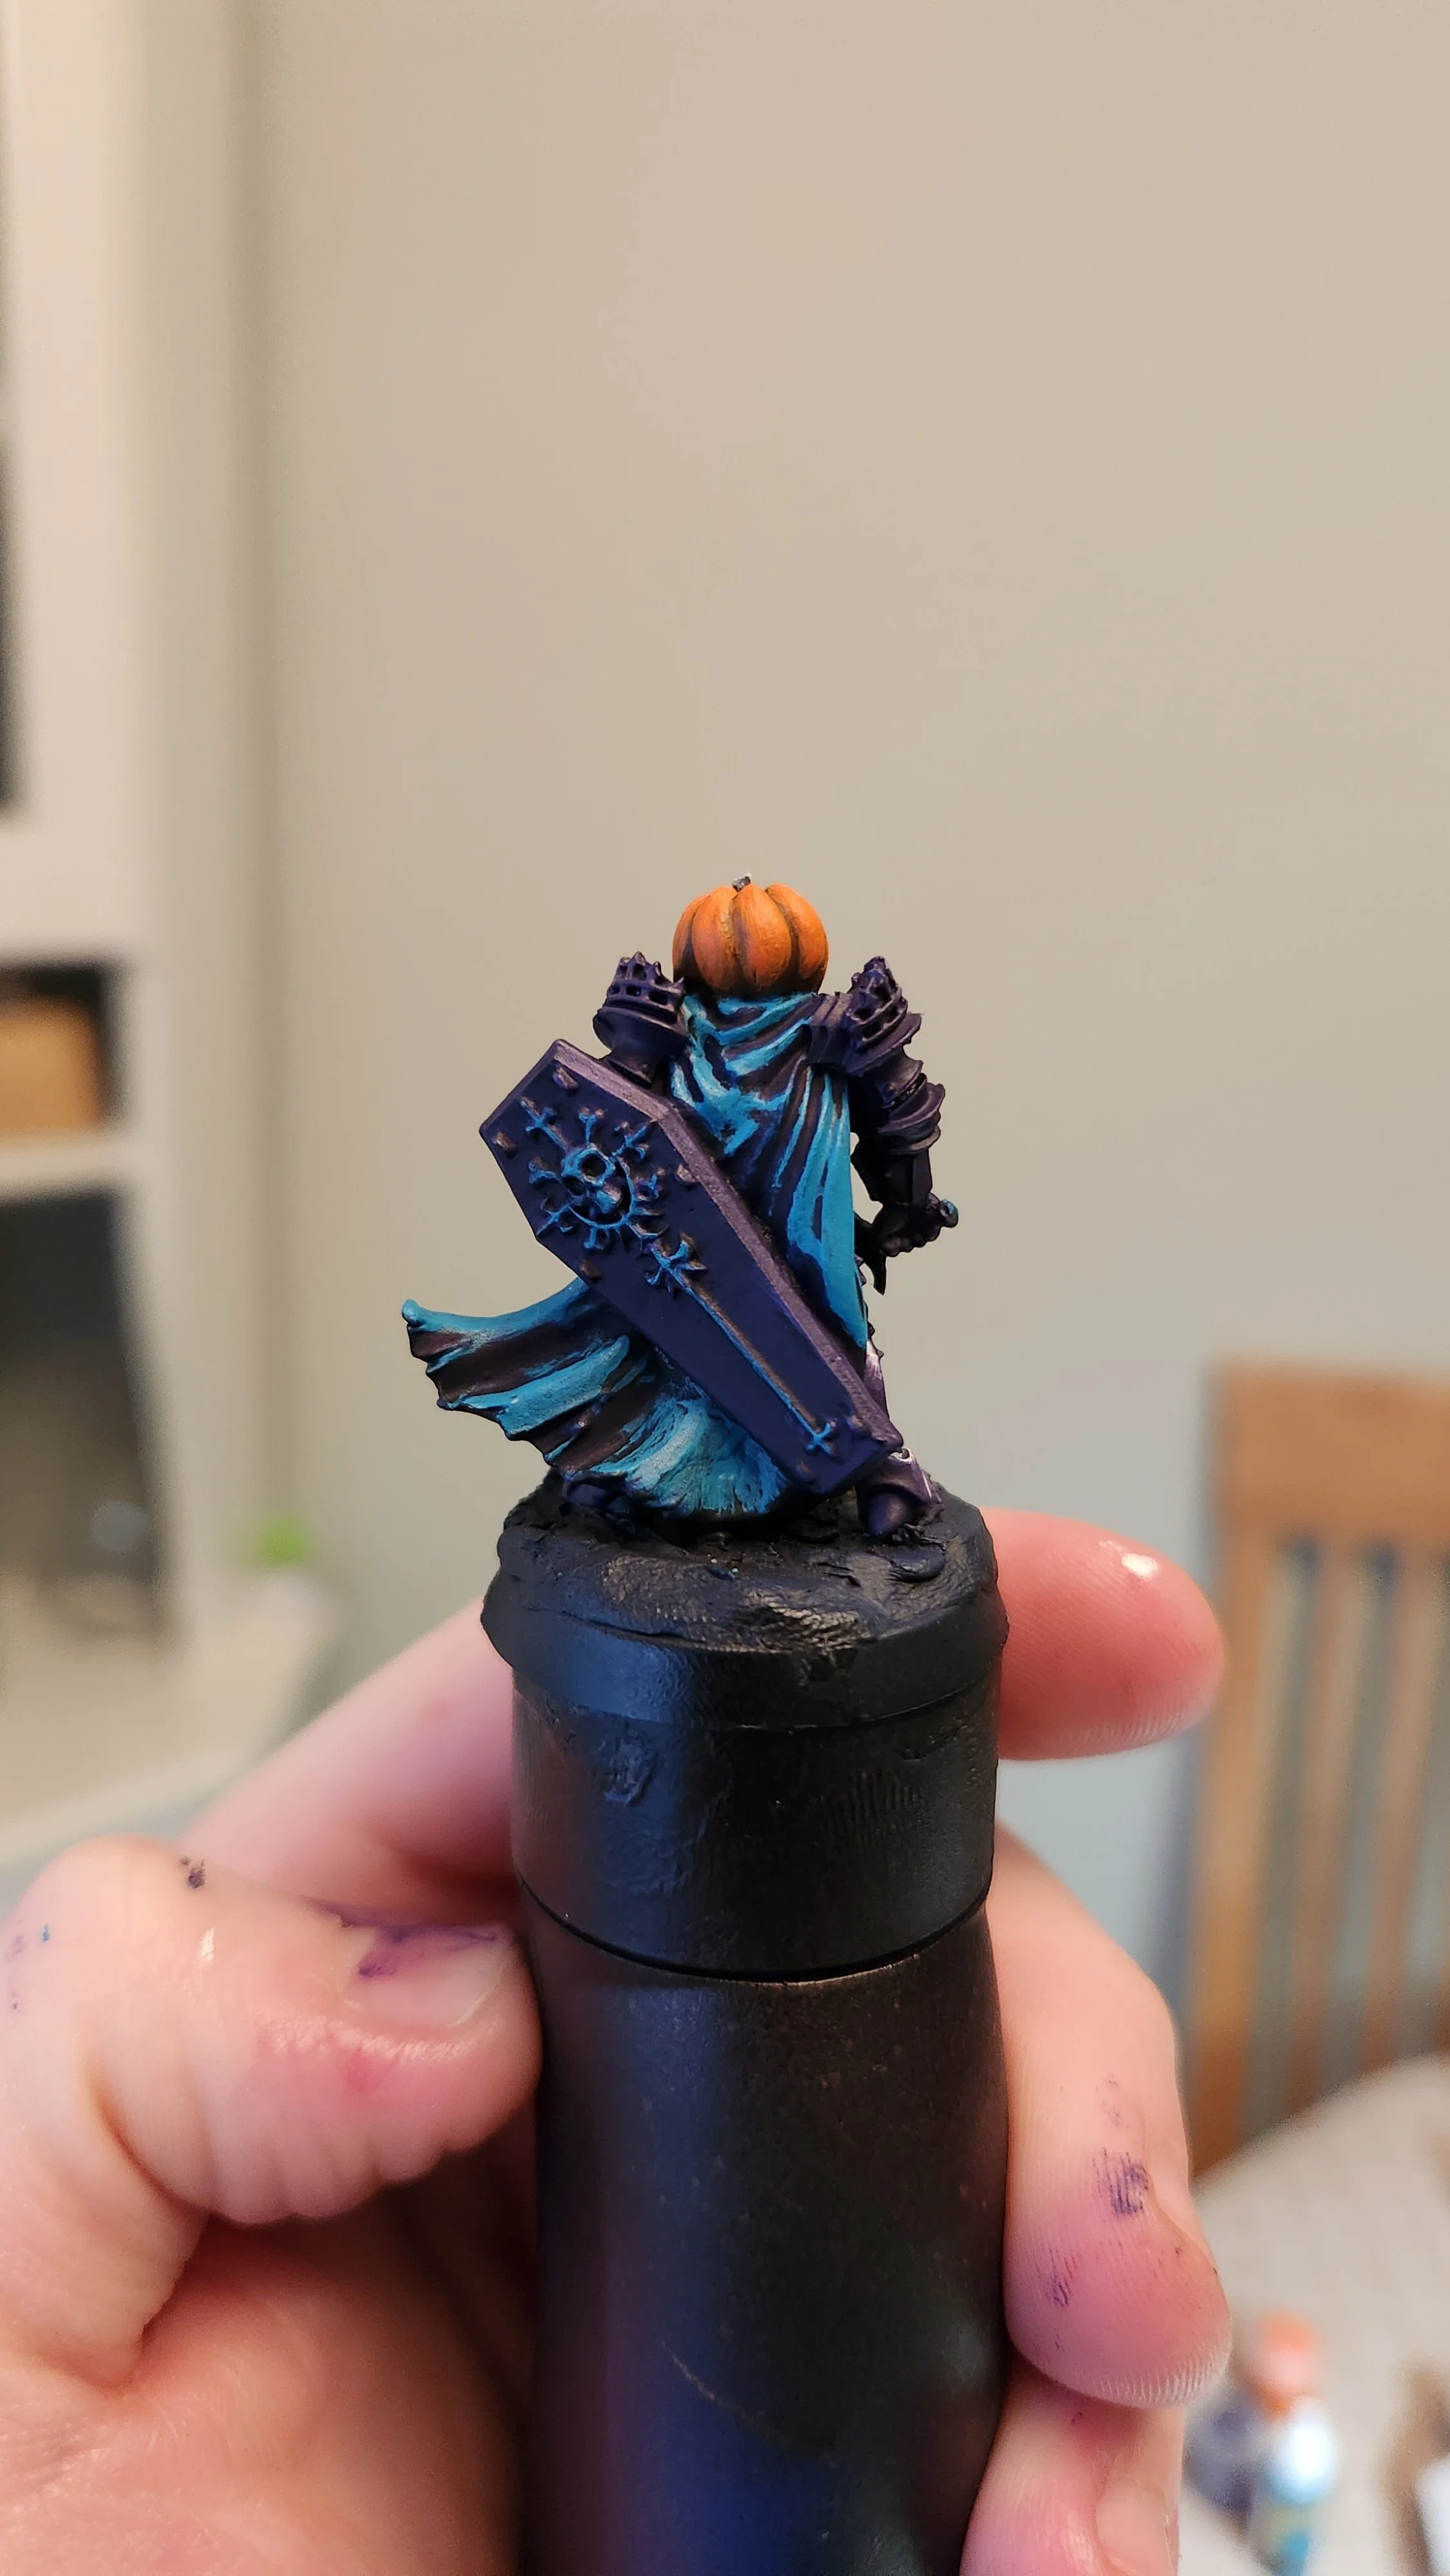
When I painted the Halloween Knight I knew I wanted to go bolder with colours to push myself to try something new at the time. I used Citadel Naggaroth Night for the base of the armour then layered highlights of Phoenician Purple. I wanted to try some form on non metallic metal for the first time and put very basic white edge highlights on edges of the armour. Looking back I know I overdone it but I am still proud of how the stylized look turned out. His cape and shield trim were done with Army Painter Hydra Turquoise, I deliberately left bold shadows in the cape to keep the aesthetic I was going for.
For his head I started with a Dark Umber then layered a Camo Green mixed with Yellow in the ridges of the pumpkin. For the pumpkin skin I used Citadel Trollslayer orange in small layers until I had full coverage but leaving the underside of the head in shadow.
Again for his sword I wanted to push myself to try something new and paint a glowing hot sword. I used the Hydra Turquoise still on my palette for the base sword colour and layered the Trollslayer on the raised side of the sword leaving a hint of the Turquoise on the downwards facing sections. I then painted the edges and tip of the blade pure white to indicate the heat of the blade.
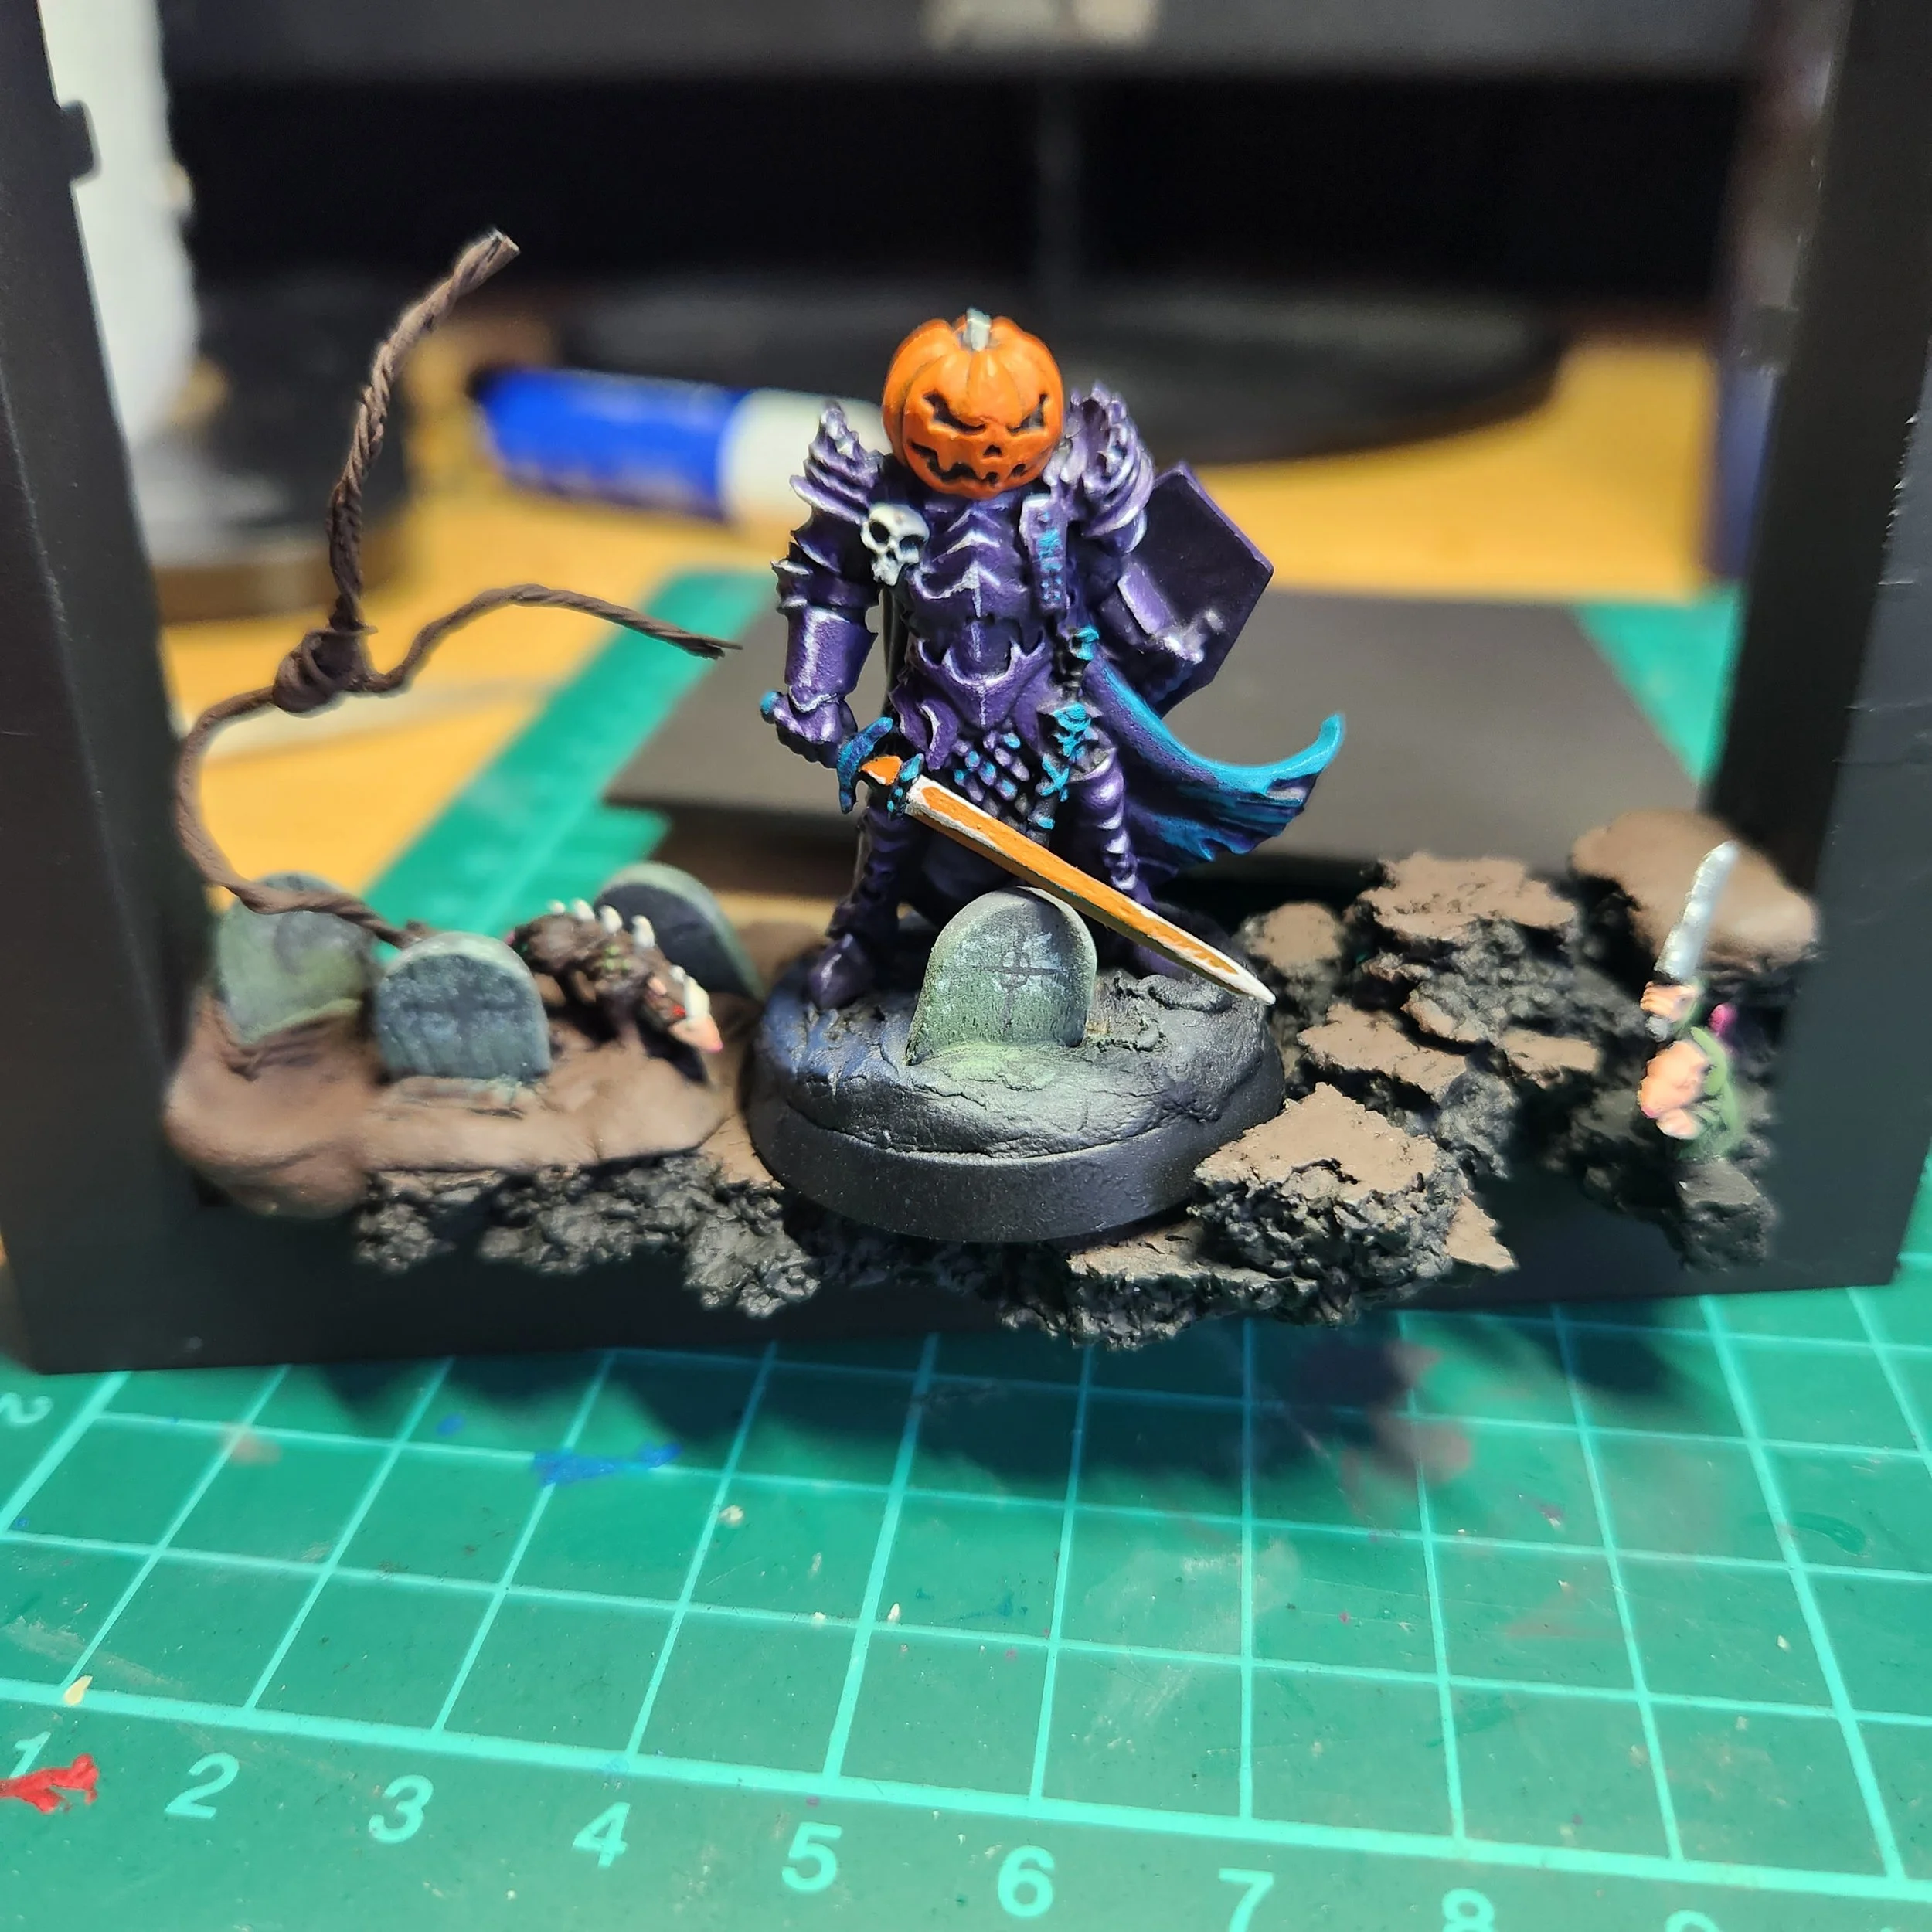
Next I started painting the foreground in the frame using a light brown for the floor. I wasn’t worried about about any extra brown tones as I wanted to add snow to make it a winter scene. I painted up the gravestones with Pro Acryl Dark warm grey, painting on variour religious symbols in black. Then I stippled on a lighter grey and white followed by a Green wash to make the stones aged and weathered with moss and spotting. I used Dark Umber for the tree with a Light Umber drybrush.
I painted up the rats using the colours already on my palette with a added Tan Flesh for their skin. Using the grey for the rat’s sword with white for highlights and the bone spine on the dog rat.
Once it was all dry I used Citadel Valhallan Blizzard Technical Paint to add snowfall to the diorama, covering the raised areas and floor. I raided my tufts box for some dead grass tufts to stick down alongside some purple flowers for a spot of colour also covering them lightly in snow. I dug the hole out of the cork in the middle for the magnet to go to hold the Knight in the diorama.
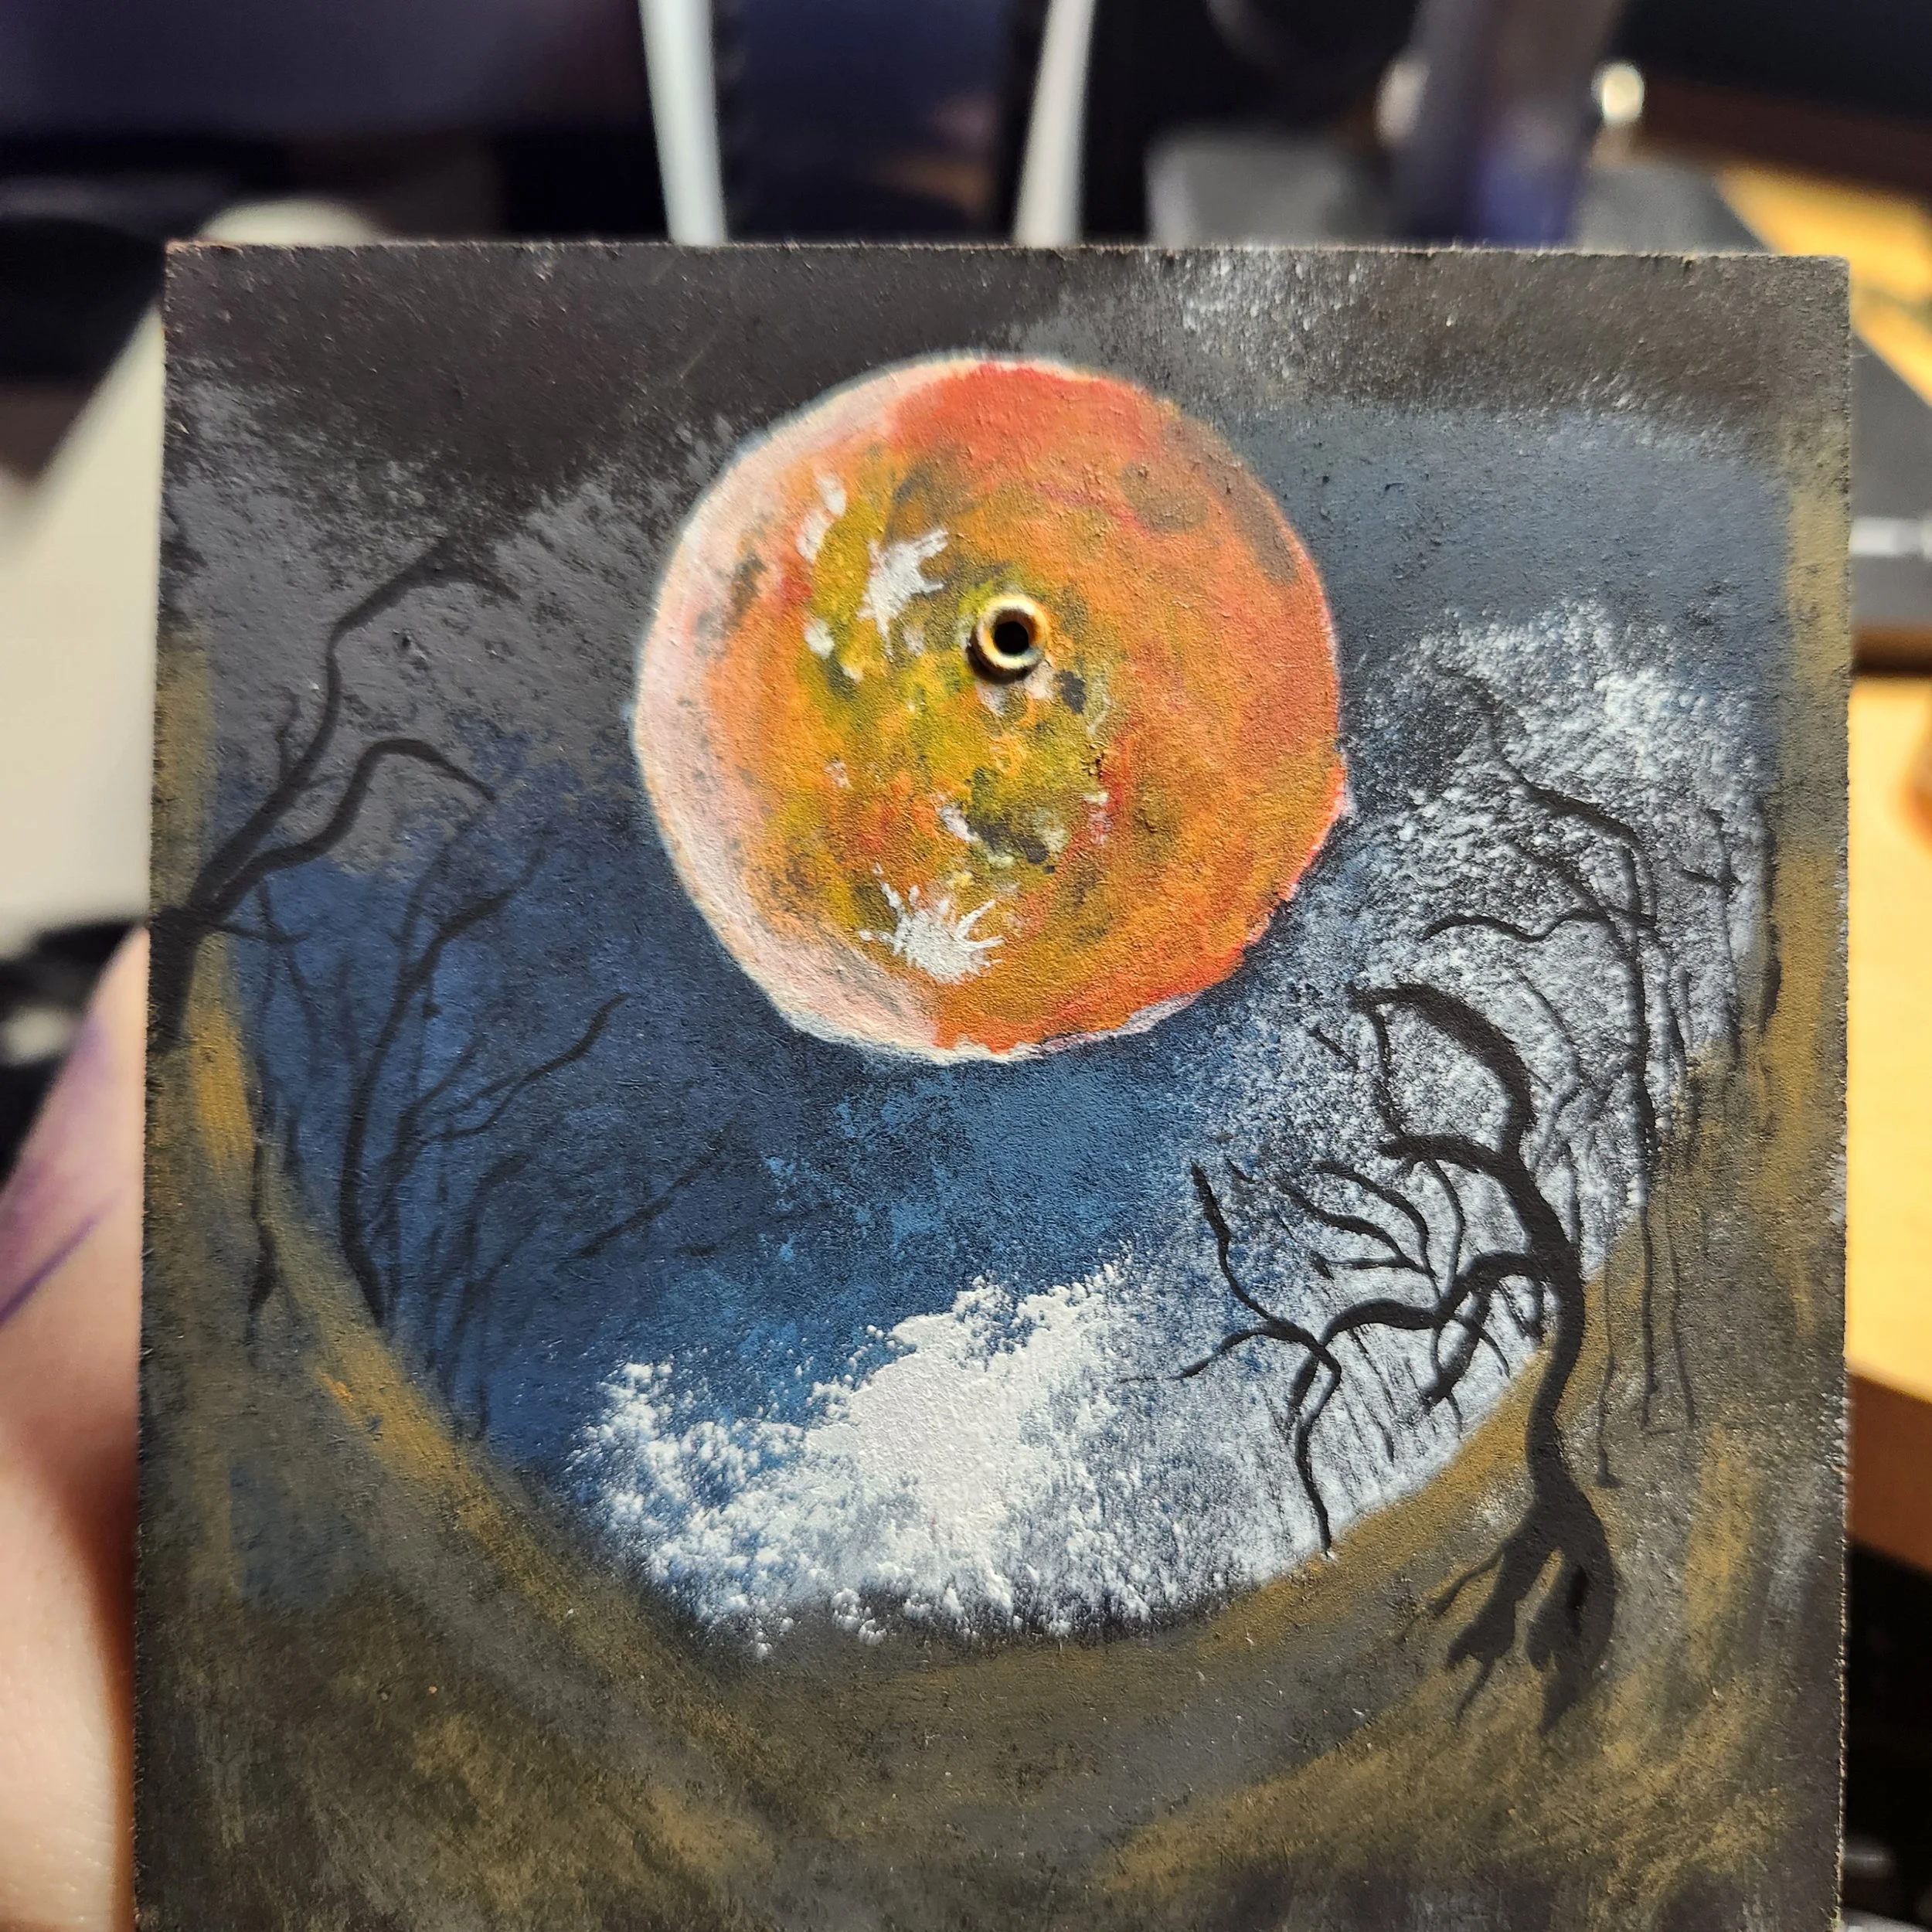
Now all that was left to do was paint the background! As I was painting the Knight I was deciding on what kind of background I wanted to do and after recently playing Bloodborne, I was inspired to paint a creepy blood moon. I sketched in the moon behind the model so I had my framing correct. I then stippled various greys, blues and white on the canvas, mixing them together into various tones. Working my way forward I painted the Dark and light Umber into a forest tunnel shape curving up the sides of the frame. Using Pro Acryl Black I sketched in dead gnarled trees working from the foreground back making them lighter/thinner as I went.
For the moon I mixed various oranges, reds and yellows onto my palette and I after I placed the initial orange circle shape layer down I just started mixing them together, placing them randomly laying colour on top of colour trying to keep my brush strokes following the curve to define the shape of the moon. I finished with a edge of white on one side to show as if the moon was currently in the process of a change/spell.
I magnetized the Knight’s base and also added snow to his base to match the scene and the diorama was complete!
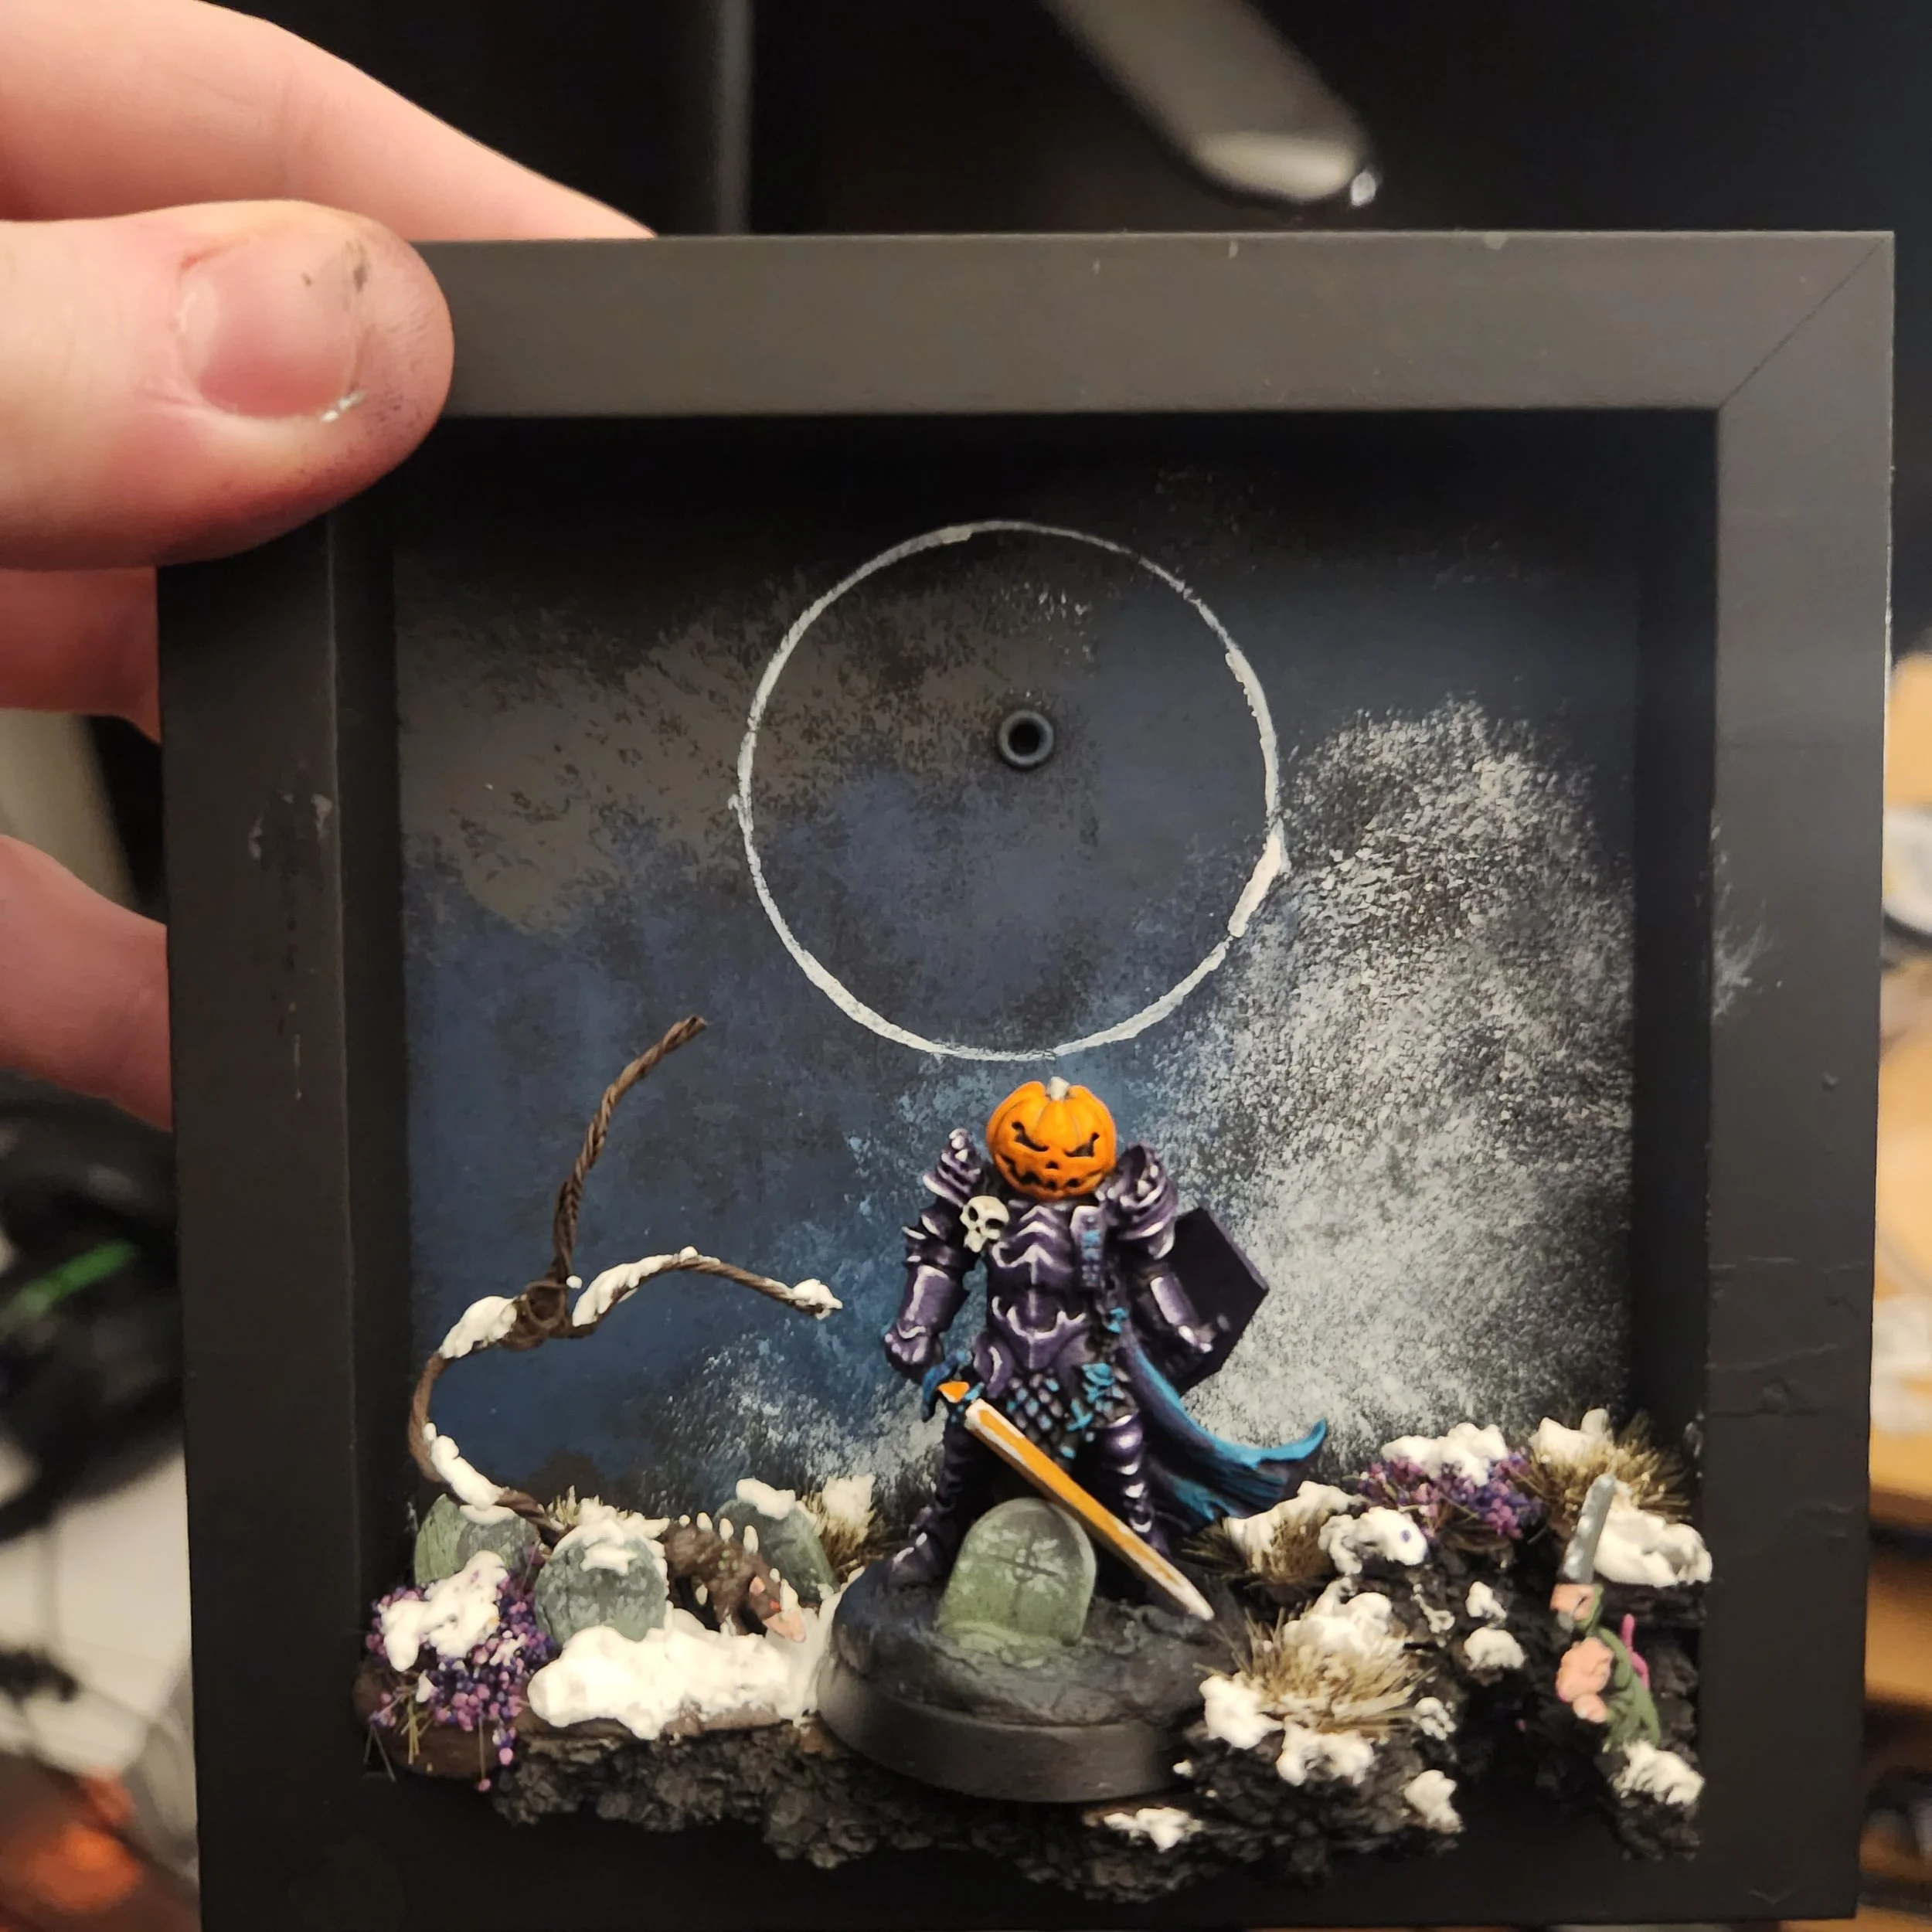
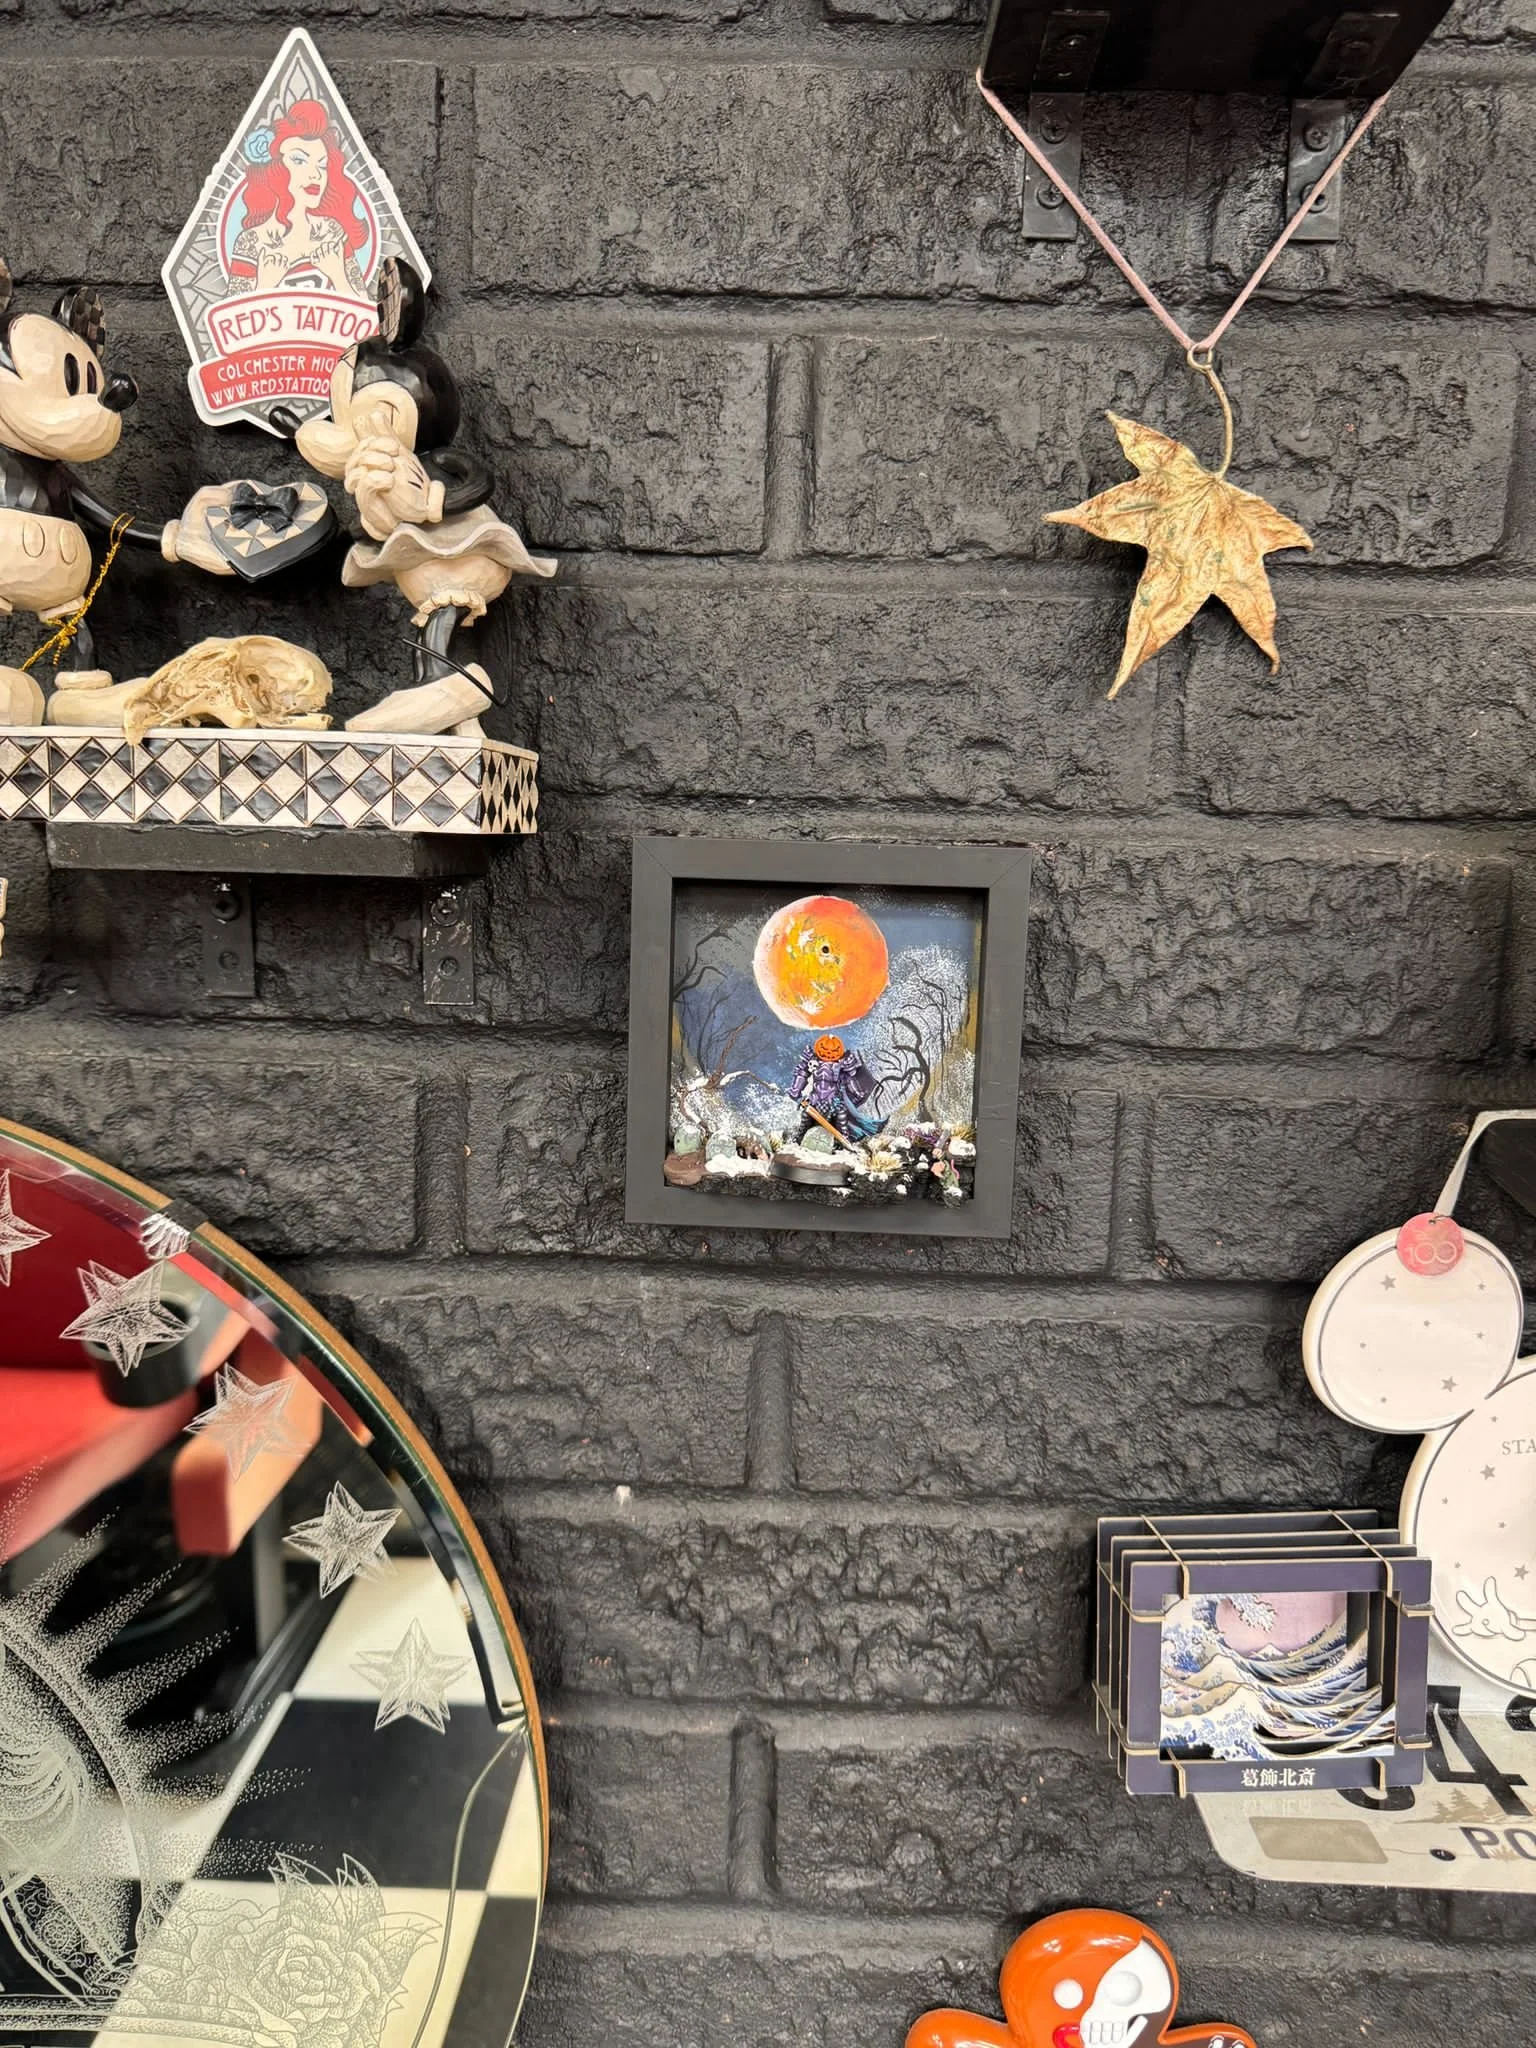
So here it is completed and on the wall of my friend’s tattoo studio! I gave it to them as a Christmas gift as it lined up nicely at the end of the year when I finished the project. I was extremely pleased with how it turned out. If I was to do it again I would use a slightly bigger photo frame for more space to tell the environmental story. And to also scrap the wire tree or make it thicker with clay.
This project really helped me get out of my head at the time and help get me back into my painting. My friend and her husband really enjoyed this gift and to this day it is still on the wall in their studio.
I hope you have all enjoyed reading this and the progress photos of this diorama. The finished photos are over at the gallery, feel free to go check them out and enjoy!